<code>タグにコードを貼り付けるためのミニアプリを作りました
個人の日記や、会社のブログを投稿するうえで、<code>タグにHTMLや、様々なコードを貼り付けるケースが多く、適切にエスケープする必要があります。
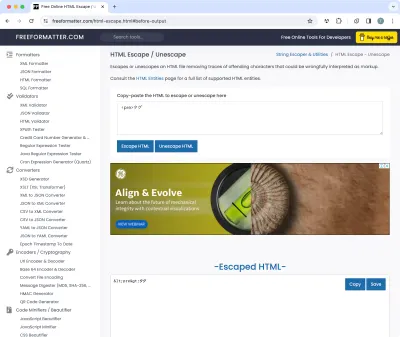
今までは、以下のサイトのように、文字列をエスケープしてくれるサイトを使っていました。
マークアップとして間違って評価されないように、文字列をエスケープしてくれるサイトです。
Free Online HTML Escape / Unescape Tool - FreeFormatter.com

しかし、このようなサイトは、バックグラウンドでどのようなことが起こっているか分からないので、あまり積極的に使いたくないな…と思っていました。
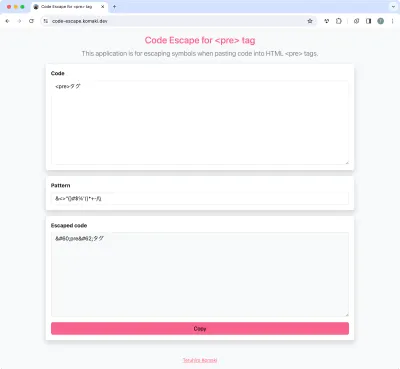
そこで、隙間時間を使い、上記のサイトの代替となりうる自分専用のミニアプリを作りました。

自分がほしいミニアプリが作れて、満足しています。
今回、初めてVite(Vite + Bootstrap + PostCSS)を使いました。
以下のコードを貼る際に、早速ミニアプリを使っています。
自分のメモのために、コードを貼っておきます。
vite.config.js
const path = require('node:path');
import viteCompression from 'vite-plugin-compression';
import {defineConfig} from 'vite';

/** @type {import('vite').UserConfig} */
export default defineConfig({
  root: path.resolve(__dirname, 'src'),
  base: '/',
  build: {
    outDir: '../dist',
  },
  server: {
    port: 8080,
  },
  plugins: [viteCompression()],
});
postcss.config.js
const autoprefixer = require('autoprefixer');
const cssnano = require('cssnano');
const purgeCss = require('@fullhuman/postcss-purgecss');

/** @type {import('postcss-load-config').Config} */
const config = {
  plugins: [
    autoprefixer(),
    purgeCss({
      content: ['src/**/*.html'],
      variables: true,
    }),
    cssnano(),
  ],
};
module.exports = config;
src/js/main.js
// Import our custom CSS
import '../scss/styles.scss';

const DEFAULT_PATTERN = `&<>"{}#$%'()*+-\/`;

const CodeElement = document.getElementById('code');
const PatternElement = document.getElementById('pattern');
const EscapedElement = document.getElementById('escaped');
const CopyButtonElement = document.getElementById('copy');

// CodeElement
CodeElement.placeholder = `For example...\n<tag></tag>\n{{ template }}`;
CodeElement.addEventListener('input', (e) => {
  updateEscapedElement();
});
CodeElement.addEventListener('input', (e) => {
  EscapedElement.value = escapeHtml(CodeElement.value);
  CopyButtonElement.disabled = !Boolean(CodeElement.value);
});

function updateEscapedElement() {
  EscapedElement.value = escapeHtml(CodeElement.value);
  CopyButtonElement.disabled = !Boolean(CodeElement.value);
}

// PatternElement
PatternElement.value = getPattern() ? getPattern() : DEFAULT_PATTERN;
PatternElement.placeholder = DEFAULT_PATTERN;
PatternElement.addEventListener('input', (e) => {
  setPattern(PatternElement.value);
  updateEscapedElement();
});

// CopyButtonElement
CopyButtonElement.addEventListener('click', (e) => {
  onClickCopy();
});

export function onClickCopy() {
  if (EscapedElement.value) {
    navigator.clipboard.writeText(EscapedElement.value);
  }
}

function escapeHtml(text) {
  const pattern = `[${PatternElement.value}]`;
  const regexPattern = new RegExp(pattern, 'g');
  return text.replace(regexPattern, (character) => {
    return '&#' + character.charCodeAt(0) + ';';
  });

}

function getPattern() {
  return window.localStorage.getItem('pattern');
}

function setPattern(value) {
  return window.localStorage.setItem('pattern', value);
}